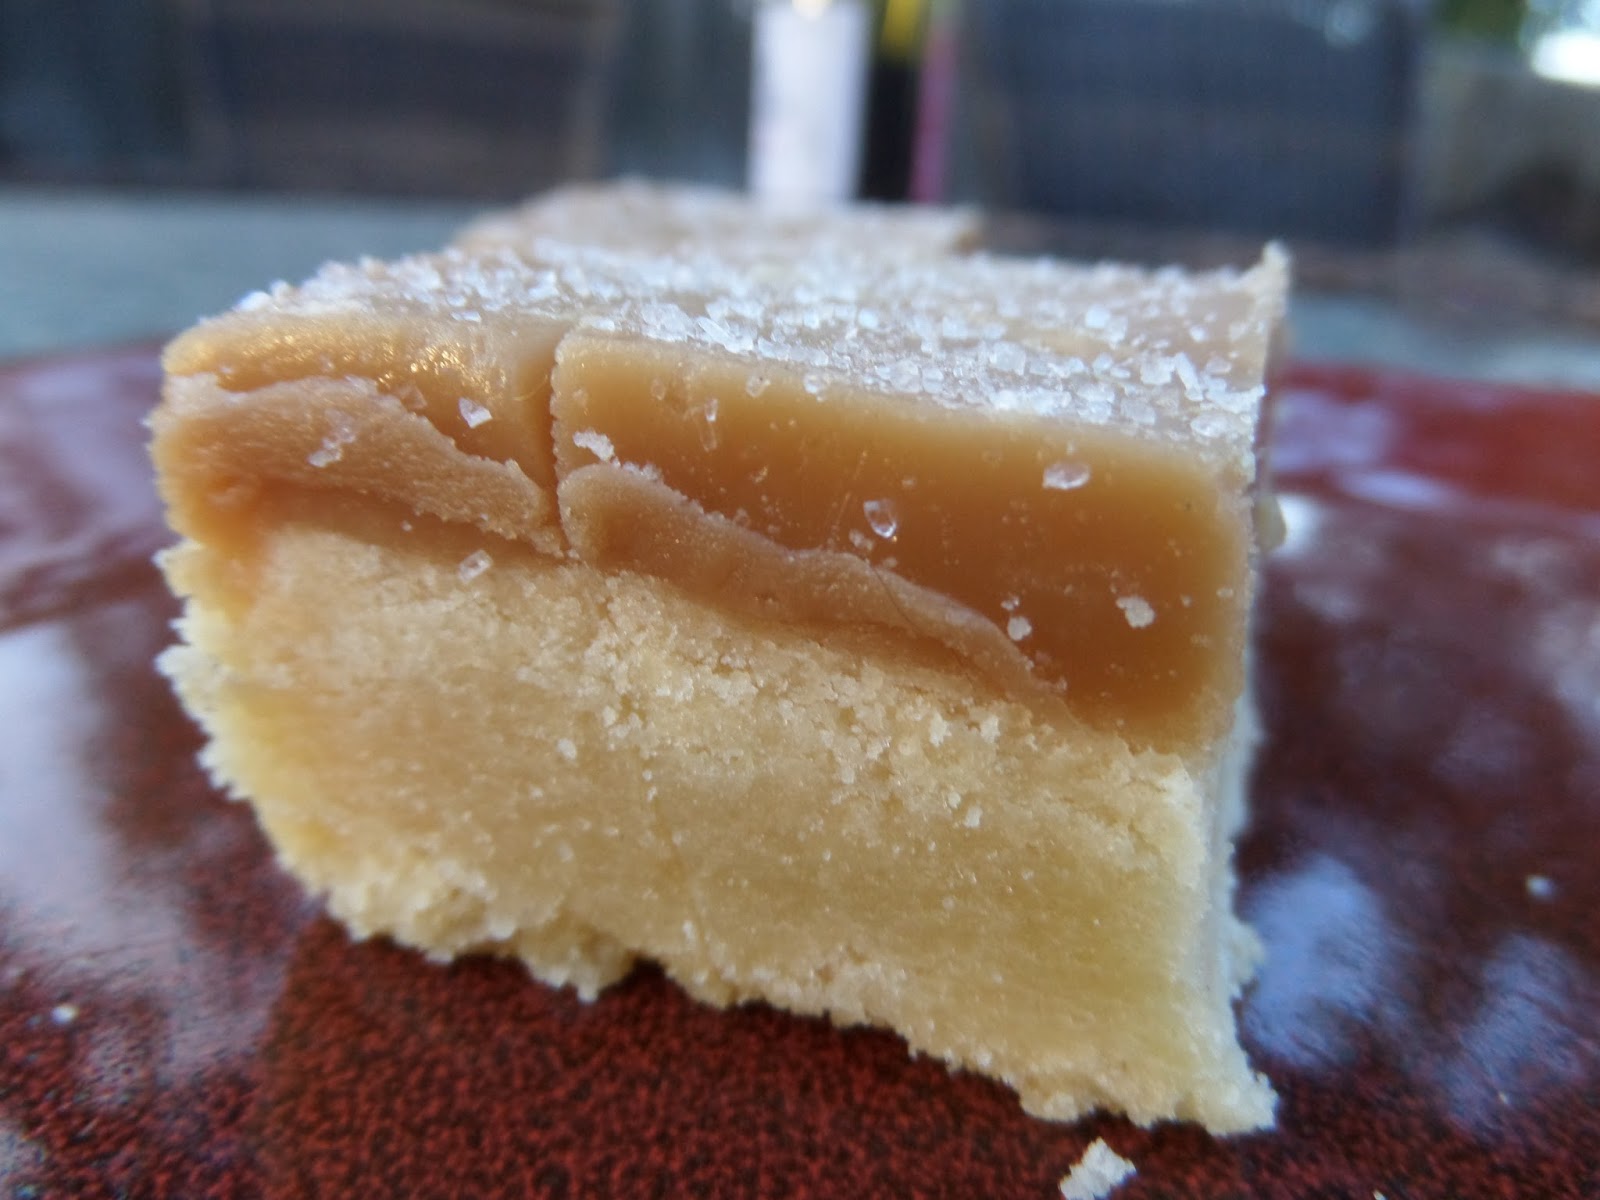
Saturday, August 24, 2013

Salted Caramel Shortbread Bars

Yummmm.
If I have a "signature" baked good, it's these fabulous salted caramel shortbread bars.
These are insanely, unbelievably delicious. They're tied with no-bake chocolate-peanut butter cookies as my all-time favorite homemade dessert.
I've made them for baby showers, dinner parties, birthdays, bachelorettes, advisory parties at school, and I've left plates of them in my schools' staff rooms at both Stapleton and GVR at key "stress" times of year (October and February). I believe salted caramel's combination of salt, sugar, and fat stimulates all the brain's pleasure centers at once, and can immediately save a frustrating day. These are like vicodon for work-related despair.
I have a long history of manipulating others with homemade snacks. My second day at my new job in Colorado, I brought my mom's recipe for apricot scones, enough for the whole staff--and from then on, everyone liked me. I realized that, through food, I could easily trick people into being my friend without adjusting my personality!
My school added our 11th grade this year, necessitating the takeover of classrooms in another building on our campus. This building is run by Denver Public Schools, not DSST, and we are only allowed to use those classrooms because the DPS people are being nice to us. So, as thanks and to suck up, I baked a big batch of these to leave in their office. I need to stay on their good side, and Salted Caramel Shortbread Bars have historically been effective to this end.
I also handed some out to new teachers to calm nerves. School starts Monday. I should maybe bake another batch this weekend...
 I originally found this recipe in Good Housekeeping, but I can't find it anywhere online. Luckily, some blogs have the exact same one. 
Salted Caramel Shortbread Bars
Makes 1 8×8″ pan, adapted from Joanne Eats Well With Others
Ingredients
For the shortbread
  • 10 tbsp unsalted butter, room temperature
  • 1/2 cup sugar
  • 1/2 tsp salt
  • 1 egg yolk
  • 1 2/3 cup flour
For the caramel
  • 1 cup unsalted butter
  • 1 cup light brown sugar
  • 3/4 cup light corn syrup
  • 2 tsp sea salt
  • 4 tbsp sugar
  • 4 tbsp heavy cream
  • 1 1/2 tsp vanilla
Instructions
  1. Line an 8×8-inch baking pan with parchment paper, leaving an overhang.
  2. To make the shortbread, combine the butter, sugar, and salt in the bowl of a stand mixer fitted with the paddle attachment mixing to combine. Add the egg yolk and continue mixing. Add in the flour and mix together just until the dough starts to come together.  Combine with your hands into a ball and pat into the parchment-lined baking sheet into one even layer. Use a fork to poke small holes in the surface.
  3. Refrigerate for 30 minutes (at least). Preheat oven to 350 and bake for 25 minutes, or until firm and golden brown. Set aside to cool.
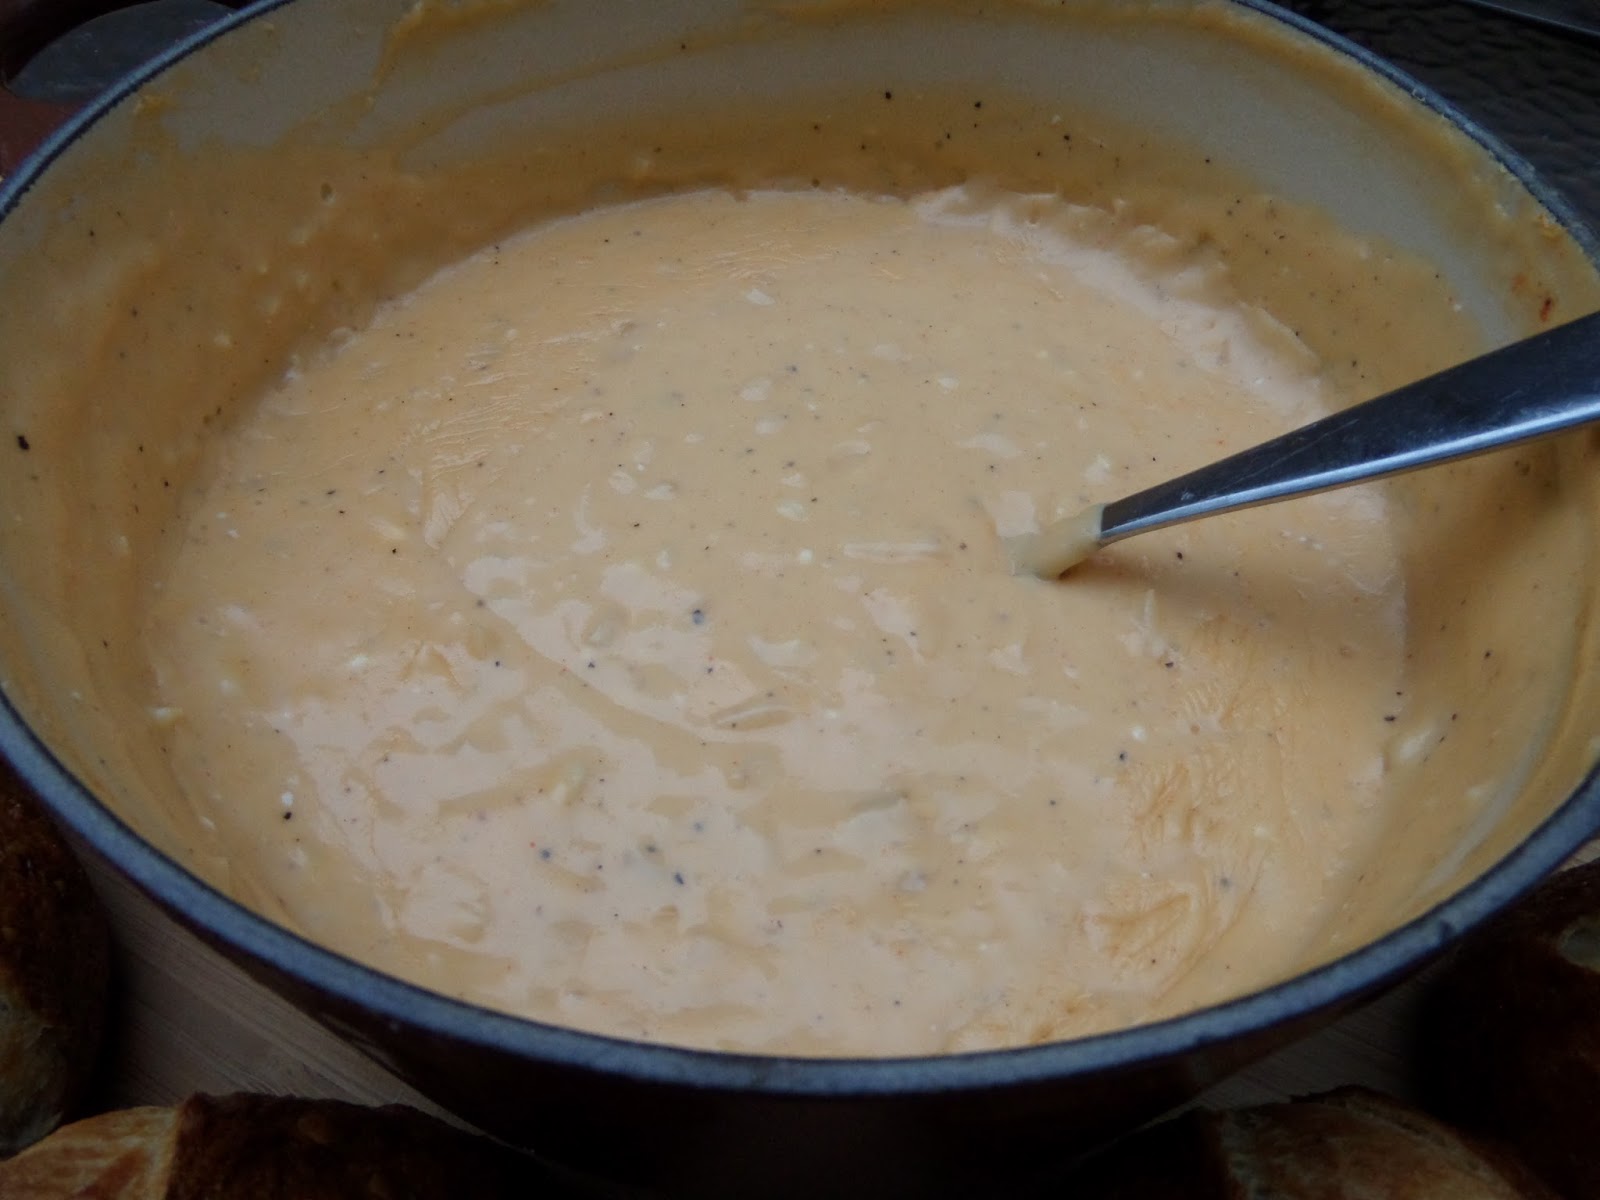
  4. To make the caramel, combine the butter, brown sugar, corn syrup, sea salt, sugar and heavy cream in a heavy-bottomed pan. Bring to a boil and stir constantly until the mixture reaches soft ball stage, about 10-15 minutes. 
  5. Remove from the heat, stir in the vanilla, and pour into the prepared pan over the crust.
  6. Refrigerate for at least 3 hours or overnight. Sprinkle with sea salt and cut into squares. Store in the fridge until ready to eat.

 I made a double batch. 

Shortbread before baking. 
Be still my heart!


Enjoy!

Saturday, August 17, 2013

Grilled Zucchini with Anchovy Vinaigrette

The garden has come a long way since I tricked my buff sister into clearing it out for me. 
The garden when we bought the house. 
Today! 
Some things have gone better than other. Squirrels ravaged our watermelon and peppers, and the mint we planted--supposed to be an almost weed-like, easy thing to grow--is a sickly yellow and barely produced enough leaves to support a lonely mojito. 
But: the zucchini, unsurprisingly, is going gangbusters! From a single plant, we are well past our 20th zucchini. Several new ones mature every day. 
The vegetable crisper, overrun with zukes!


I've made zucchini bread, zucchini latkes, and put zucchini in pad thai and green curry. And we've been grilling zucchini frequently as a side, with whatever happens to be for dinner. 
But zucchini is undeniably bland. With a simple preparation like grilling, you need something to put on it--pesto, romesco sauce, balsamic--something like that. So, to go with grilled zukes, today I made my all-time favorite salad dressing: anchovy vinaigrette. 
World's simplest, most delicious salad is crispy torn romaine, Italian parsley, and green onions--all lightly dressed with this vinaigrette. This alongside a roast chicken and a glass of red wine may be world's most perfect homemade dinner. 
Anchovy vinaigrette tastes nothing like the nasty anchovies you get on pizza--it's rich, complex, salty, and totally delicious. Even an un-adventurous eater like my mom liked it on salad last time she came to visit (the woman loathes even hypothetical fishiness in food--she's never tried sushi because she thinks it will maybe taste fishy. Alas.) 

Here is how you make it:

INGREDIENTS

  • 1/2 cup extra virgin olive oil
  • 3 tablespoons or more good red or white wine vinegar
  • Salt and fresh-ground black pepper to taste
  • 1 heaping teaspoon Dijon mustard, (optional)
  • 1 garlic clove
  • 1 tsp white sugar
  • juice of one lemon
  • 4 anchovy fillets, or more to taste, with some of their oil ( I prefer the rolled ones with capers!)
  • 1 large shallot (about 1 ounce), peeled and cut into chunks

What to do

1.
Combine all ingredients except shallot in a blender, and turn the machine on. A creamy emulsion will form within 30 seconds. Taste, and add more vinegar if necessary, about a teaspoon at a time, until the balance tastes right.
2.
Add shallot, and turn machine on and off a few times, until shallot is minced within the dressing. Taste, adjust seasoning and serve. (This vinaigrette is best made fresh but will keep refrigerated for a few days. Before using, bring it back to room temperature, and whisk briefly.
Finished vinaigrette! I made a week's worth. This keeps great in the fridge. 

I grilled some zucchinis and drizzled the vinaigrette on top--delicious! 

I made a gigantic tupperware full of grilled zukes, along with some of our patty pan squash, and a leftover red pepper from the last time I made romesco. It's school again, so having this on hand will ensure veggies find their way into our lunches this week. 
Enjoy!

Sunday, August 11, 2013

Classic Mussels


Today was my last day of summer! And a momentous summer it was--a perfect wedding, a spectacular honeymoon, our tadpoles turned into frogs, our garden produced actual food. Nothing could have been better. But all good things must come to an end, and someone has to get our founding class to a 23 or higher ACT. And someone has to act like a bitch until people take their reading homework seriously. And someone needs to yell about lay vs. lie. And that someone can really be no one but me. So in the morning, I have to drive on the highway again, back to work.  
So to celebrate the final summer dinner, I made mussels. I made them my favorite way--super simply, the classic, most basic way--fennel, garlic, butter, wine, a few fresh herbs tossed in at the very end. 
Mussels are incredibly delicious, and incredibly easy to make at home. They seem fancy, but don't be fooled--this is easier than searing chicken breasts. A big bowl of mussels, some buttery toast, cold white wine--a perfectly elegant summer dinner, made even better if you have somewhere outside to sit while you eat. 
Ingredients! Mussels, butter, fennel, wine, shallots, parsley, garlic. 
Ingredients: 
1 bag of mussels (sold at the butcher counter of the grocery store, even in Denver)
1 bulb of fennel
1 large (or 2 small) shallot, diced
4 fat (or 6 less fat) cloves of garlic, minced
half a bottle of white wine (any kind is fine)
a handful of parsley, chopped
salt and pepper to taste

What to do: 
Start by cutting the mussels out of their mesh bag. Place them in a bowl and fill the bowl with cold tap water. Leave them for half and hour. This soaking in fresh water will cause them to expel any sand that they may have in their shells. (note--I read mussel recipes that mention "debearding". I don't know what this really means, as no mussel I've cooked has a noticeable beard. I've always ignored this and been fine, so you should too)
Mussels before cooking.
Saute the fennel, shallot, and garlic in the butter for about 6 minutes. The fennel and shallot should be translucent.
Sauteing the garlic, shallot, and fennel. I also grilled some zucchini and patty pan squash from the garden as a side.   
Add the wine and bring to a boil. Throw in a pinch of salt and pepper. Allow to boil for about 2 minutes, so the flavors of the fennel, shallot, and garlic infuse the wine and the alcohol edge mellows out.
Drain the mussels in a colander. Add them to the bubbling wine mix. Cover the pot but leave the heat all the way up. Leave for five minutes.
They are done!
Open the pot and stir the mussels. Are they all open? If so, they're done! If not, cover again and cook more.
When they're open, stir in the chopped parsley and stir the mussels around to soak them all in the sauce.
Serve in bowls, with buttery toasted bread.
Use the mussel shell as a spoon, scooping up sauce with each bite.
I baked some bread to go with the mussels. I ended up buttering and grilling fat slices--delicious. 

This was delicious. We ate on the deck, shooing away flies and poorly-behaved dogs. 
It was the perfect end to the best possible summer. 
Enjoy!

Wednesday, August 7, 2013

Beer Cheese!

Sometimes you just feel like being bad
I cook for a lot of reasons--virtue isn't one of them. There are enough (white) people in the world finding their morality through food. You will see them reading Michael Pollan, doing things with blenders and kale, paying more for a story about their bacon's cozy death, forgoing sex for yoga, and not eating beer cheese.
But--
Beer cheese. BEER CHEESE.  As soon as I heard of it, I had to make it. And it is everything I ever dreamed beer cheese could be: it's sharp, creamy, cheesy, hoppy, and utterly, utterly delicious in the worst way. It's like the adult version of that gloppy yellow cheese from a can you used to get on your nachos at the roller rink.
I baked some pretzels to dip into it.
So, so, so good. Just to increase the lack-of-virtue pleasure factor of this amazing snack, I served it for the Bachelorette finale viewing party. Terrible tv, amazingly terrible gooey food--a great night.
Yes.
And it's easy! This can be whipped up in ten minutes.

Ingredients 

1 can or bottle of beer (I use Yella Pils from Oskar Blues)
1 small yellow onion, finely diced
1 tablespoon butter
1 tablespoon flour
3 cloves of garlic, finely minced
5 tablespoons cream cheese
2 cups grated sharp cheddar cheese
sprinkle of cayenne
sprinkle of mustard powder
sprinkle of smoked paprika
salt and pepper to taste

Beer cheese ingredients
This pre-shredded cheddar is FANCY.

What to do 

Dice the onion and add it to a medium saucepan with a tablespoon of butter. Sweat the onions in the butter until they're translucent, and just barely starting to caramelize, about 7 minutes.
Sprinkle the tablespoon of flour onto the butter and onions. Mix it around to cook the flour for about 3 more minutes.
Pour the beer into the pan. Scrape all around the edges, getting up the burned bits of onion and flour. Bring to a boil.
Get your wire whisk. Turn the heat down to low. Add the cheese, a little at a time, while whisking constantly. The only lumps should be the diced onions and bits of minced garlic.
Sprinkle in the cayenne, mustard, and smoked paprinka (A 1/4 teaspoon of each?) just a small sprinkle. Whisk in.
Cover until using. Serve warm, ideally with soft pretzels, but anything could be yummy to dip in: small hard pretzels, crackers, etc.


This was awesome!
Save virtue for work--pleasure is for home.
Make beer cheese as soon as you can.
Enjoy!

Tuesday, August 6, 2013

Chinese Chicken with Snow Peas and Broccoli


I adapted this recipe from an old copy of Everyday Food--the original recipe is for cashew chicken, but I couldn't find raw cashews at the grocery store, and I thought using the roasted salted ones would make it too salty. So, I just substituted veggies for the nuts and added a little more heat.
This was a great weeknight dinner: quick and easy to make, healthy, cheap. Three pounds of chicken thighs were only $6.50 and a head of broccoli was $1.I bought garlic, chicken broth and ginger but had more of the other ingredients on hand--soy sauce, sherry, hoisin sauce, cornstarch, and chili-garlic paste.
This was yummy. Next time I'll use zucchini, since the garden is producing an insane amount of it.
I made enough to last for a few dinners--halve the recipe if you only want a dinner for two out of it.

Ingredients
2 lbs boneless, skinless chicken thighs, cut into 1 inch cubes
1.5 tablespoons cornstarch
1 tablespoon sesame oil
2 tablespoons olive or vegetable oil
5 cloves of garlic, minced or grated
a 2 inch chunk of ginger, minced or grated
2 tablespoons sherry or Chinese cooking wine
1 can on chicken broth
2 tablespoons soy sauce (or more, according to taste)
2 tablespoons hoisin sauce
1 tablespoon chili-garlic paste or Sriraccha
2 cups of snow peas
2 cups of broccoli ( 1 crown) chopped or broken into florets

What to do

Grate the ginger and garlic and chop the chicken.
Chopped chicken, grated ginger and garlic. 
Heat up the sesame oil and olive oil in a deep saucepan. Sprinkle the cornstarch over the chopped chicken. When the oil is shimmering hot, add the chicken and brown thoroughly. You will need to mix it around every few minutes. This will take about 10-15 minutes.
Chicken being browned in sesame oil. 
Then, when the chicken in browned all over, toss the grated ginger and garlic in and mix it around, cooking it a bit in the oil. Cook the ginger and garlic for about two minutes.
Pour in the chicken broth, sherry, soy sauce, hoisin sauce, and chili-garlic paste. Mix, scraping the bottom on the pan to get up any bits that stuck while you were browning the chicken. Bring to a simmer then cover the pan. Simmer for 10 minutes to get the sauce thick, "melded", and infusing the chicken.
At this point, you can finish the recipe, or you can wait. The previous steps can be prepared ahead of time if that suits your schedule. Just turn the heat off and leave the chicken soaking in the sauce until right before you're ready to eat.
Right before you're ready to serve, turn the heat back up to high. Toss in the snow peas and broccoli and cover the pot. Allow the veggies to cook in the steam from the sauce for about 3 minutes. You want them to stay fresh-tasting and crisp, so don't overcook.
Open the pot and mix everything together.
Serve over rice.
Messy and yummy. 
I of course drowned mine in extra Sriracha.

This was a great, budget-friendly week-night meal. I will be making it over and over.
Enjoy!

Thursday, August 1, 2013

Short Rib Ragu

A rich, sticky pot of meat and tomato goodness.
After two weeks of our Belize fish-and-beer diet, I was really craving something meaty and hearty. After all, fish meat is practically a vegetable.
 
This is really the sort of dish that evokes snowy evenings, wool socks, dark stouts, and exhausted ski legs. But I wanted it in July, when the oven shouldn't even have been turned on. Well, whatever--the stomach wants what it wants!
Any ragu takes hours to make. And short rib ragu takes an especially long time, as it involves braising meat on the bone, then taking it off the bone and adding it back into the sauce. 
But--it's still summer, so I had the whole day free. And putzing around in the kitchen braising meat is obviously the best possible way to spend an afternoon.
And this sauce is WORTH the time. It is totally, totally fabulous. Short ribs have a distinct flavor--between an aged steak and a pot roast--a meaty, melt-in-your-mouth fattiness. The tomatoes, cooked for hours, are jammy and dense; the garlic and wine have a mellow sweetness; the onions and bacon are barely detectable in the background. Absolutely delicious. I like to serve it over a big-textured pasta--like rigatoni or campanelle--with a dab of ricotta and some fresh basil. 
Oh hell yes.
This is tied with lamb ragu as my all-time favorite pasta sauce. It takes time, but it's special enough to serve for a holiday or occasion. 

Short Rib Ragu 

Ingredients 

About 8 beef short ribs (2 grocery store packages). Make sure to get the ones on the bone. 
2 large yellow onions, diced
6 strips of bacon, chopped
half a bottle of red wine
1 bulb of garlic 
About 12 fresh tomatoes (I used a combination of roma and hothouse tomatoes)
1 can of diced tomatoes
a cup of flour
olive oil 
salt and pepper 
dash of sugar

What to do 

The first step is to brown the short ribs. A good brown crust on meat is essential to a good braise. First, sprinkle the shortribs with salt and pepper. Heat up a few glugs of oil in the bottom of the pot you'll use for the sauce. 
Dredge the short ribs in flour, then brown on all sides in the oil. You will need to work in batches. Remove the browned short ribs to a plate and set aside. 
Short ribs browning. 
Short ribs post-browning. 
After browning, leave the oil in the bottom of the pan. Dice the onions and chop the bacon--add them to the oil and cook until the onions are starting to brown, about 20 minutes. 

Your kitchen smells amazing at this point.
When the onions are soft, translucent, and a light caramel color, pour in half of a bottle of red wine. Pour yourself a glass with the remaining wine to enhance your cooking experience.
Allow the wine to boil and reduce by about half--this should take about 8 minutes. Stir occasionally, making sure to scrape up the cooked bits of bacon, onion and short rib that may be sticking to the bottom of the pot. 
Wine  reducing with onions and bacon.
While the wine is reducing, peel all the cloves of a bulb of garlic. Place them in a blender or food processor. Add the fresh tomatoes in with them and blitz everything up into a smooth puree. 

Before.
After.
After the wine is reduced, add the tomato garlic puree to the pot. Stir to combine everything and bring to a boil. Allow to boil and reduce on medium heat for 20 minutes. 
Add the can of tomato puree, a dash of salt and pepper, and about a tablespoon of sugar. Bring back to a boil and allow to boil on medium for about 10 more minutes. 
At this point, add the short ribs back into the sauce. Submerge each one. Cover the pot and place into the oven at 300 degrees. 
Leave in the oven for 3 hours and 30 minutes. (Or longer--but at LEAST 3:30). 
During this time, clean your kitchen up, enjoy the smell, and try to resist the urge to peek in the pot too often. 
After the time has passed, take the pot out of the oven and allow to cool slightly for 10 minutes. 
There will be a layer of fat sitting on top of the sauce--skim off most of it and throw it away. 
Remove the short ribs from the sauce with tongs. They will be extremely tender. Place on a plate or cutting board and allow to cool until you can handle them with your hands. 
Short ribs after braising.
When the ribs are cooled, take the meat off the bone and chop or shred it. Add the meat back into the sauce and throw the bones away. 
And---you're done!!! 
Worth the wait!
Boil up some pasta and drown it in this fabulous ragu. Tear up some fresh basil and sprinkle it on, and top it with a blob of whole-milk ricotta. 
I cannot over-emphasize how fabulous this sauce is. Make it the next time you really want to impress. 

Enjoy!