 |
| Pad Thai for a crowd! |
I have been neglecting my recipe blogging this school year--all the post planning-and-grading evening hours I typically spend writing about cooking was suddenly shunted into writing college letters of recommendation for our VERY FIRST graduating class (*tear*). It was exhausting but worthwhile. I was thrilled and proud to have written a letter for my school's very first Ivy League accepted student.l. So work has been crazy busy, but also productive, rewarding, and fun.
During this hectic time, I've been cooking quite a bit--but just haven't bothered to take pictures of anything I made, let alone write it up.
So, I finally remembered with this Pad Thai, which I made last Tuesday night. I have been revising and re-revising my Pad Thai recipe for about a year--and I've finally settled on the definitive version. My recipe is authentic enough in a white-washed way, not crazily intricate or inclusive of impossible-to-find ingredients, like most of the pad thai recipes online written by actual Thai cooks. (The best website for actually-authentic Thai recipes is Thai Table, whose
pad thai recipe includes preserved turnip and banana flower.) On the other end of the spectrum are super-whitewashed pad thai recipes, whose egregious, gross Americanizations include
using ketchup or including
turkey and a fucking slow cooker! No no no. This is Republican-mom recipe whitewashing, what Ann Romney probably thinks is pad thai.
On the Democrat side of fucking-up recipes, you have bullshit of the cider-vinegar, vegan,
agave-syrup variety--even calling this "pad thai" is just wishful, deluded thinking on the part of sad, shivery, anemic vegans, consoling themselves with these disgusting fake noodles in the dark, skinny evenings of their empty and virtuous lives.
So my recipe is authentic-enough, makes no attempt at health consciousness, and tastes AMAZING. The one ingredient you need to go to an Asian market for is tamarind paste or tamarind concentrate (the paste is a solid, gummy block--the concentrate is liquid). Although, you can often find tamarind concentrate in a Hispanic market, too--just be careful not to buy the pre-sweetened kind.
All measurements are mere suggestions. I have never measured this. But this is an inexacting recipe--measurements are unnecessary.
This amount feeds 6-8 people. I always make this for a crowd. Last Tuesday I made it for Bachelor Night, for eight-ish people, and finished all of it.
Just halve things if you want dinner for two, plus leftovers.
Ingredients
2 or 3 packages of Pad Thai rice noodles
garlic
shallots
peanut oil
tamarind concentrate
fish sauce (Thai or Vietnamese)
brown sugar
2 or 3 eggs
bean sprouts
crushed peanuts
cilantro
lime
optional spicy stuff of your choice
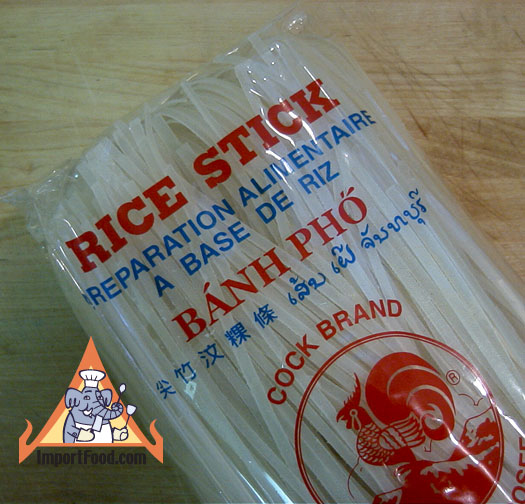
Step 1: Soak two or three packages of rice noodles. Go buy dried or fresh pad thai rice noodles(you can find fresh in Asian supermarkets. Shout out to Pacific Ocean Marketplace). You can use thin, traditional pad thai noodles(often called "rice stick"), or thicker rice noodles usually used for Pad Seau. Put them in a bowl of room-temperature water with a few drops of peanut oil. Soak while you do everything else. NEVER BOIL RICE NOODLES.
 |
| What I usually buy. |
Step 2. Make the sauce (these measurements are estimations). Combine 3/4 cup tamarind concentrate, 1/2 cup packed, light brown sugar (otherwise known as a handful and a half of brown sugar) and 1/2 cup fish sauce. Whisk together until sugar is dissolved. At this point, I include something spicy--a tablespoon of asian chile paste, a big squirt of sriracha, or a teaspoon of cayenne. But spice is optional and to taste.
Step 3: Dice up a BIG HANDFUL of garlic cloves (10-12 cloves) and two big handfuls of shallots. This is the most annoying part of the whole recipe.
Step 4: Cook! Ok, here is what you do: pour enough peanut oil into the bottom of your pot to coat it, then heat the oil up on high heat. When shimmering, toss in your minced garlic and shallot and fry, stirring frequently, in the oil for about 3-4 minutes. This will infuse the oil with these flavors, and mellow the aromatics out a bit.
 |
| Garlic and shallots frying in peanut oil. |
Then, drain your noodles and place them in the hot pan. Use tongs to turn them--they'll slowly soften and cook. After about 3 minutes, add the sauce, then continue turning.
When noodles are hot and cooked, break two or three eggs over the noodles, and turn with tongs some more, until the eggs are broken and softly cooked, clinging to the hot noodles.
Then, toss in two handfuls of white bean sprouts, turn with tongs to incorporate into the noodles.
Step 5--finish! Top the noodles with a cup of crushed peanuts (put cocktail peanuts in a bag and step on them) and a bunch of chopped cilantro (buy one bunch, rinse and chop) (note--in the pictures I have green onions instead of cilantro, because the market was out). Quarter several limes and serve on the side for people to juice onto their portions. Some people might want soy sauce, for more salt. I also serve mine with sriracha, but that's just me.
 |
| Mountain of noodles, ready to be attacked. |
 |
| My (first) plate. I used thicker rice noodles this time. |
This is a basic, meatless version, but I also love it with shrimp or fried tofu.
Enjoy!


