Monday, April 15, 2013

Bean and Herb Salad with Lemon Vinagrette

This is a fresh, bright side dish. You could also have it as a light lunch, perhaps with some good toast spread with ricotta. Hmm. I have everything to make that in my fridge right now...
I made this to go with my glazed pork shoulder. It was an excellent counterpoint to the rich, sweet, fatty slow-cooked pork. The mint was a MUST. This made me resolve to use mint in savory preparations more often.

Ingredients:
1 package dry large lima beans or giante beans, cooked and cooled
1 bunch mint, chopped
1 bunch parsley, chopped
1 small package / bunch basil, chopped
1 red onion, chopped or slivered
juice of 3 lemons
3 TB olive oil
Pinch salt and pepper

What to do:
1.  Cook the beans. You could soak them overnight, or boil, let cool, then simmer until done. I chose the second option--I boiled them, then let the water cool all the way, then simmered them for about 20 minutes, then ran them under cold water to cool them off. 

You want to beans cooked, but not mushy. I always use dried Lima / gigante beans. Whereas canned garbanzos taste great, canned lima beans have an unpleasant cafeteria-food taste.
Beans nice and fat after a simmer.

2. From there it's really easy. Chop all the herbs together and toss them over the beans. Slice up the red onion and put that in too. Juice the lemon over the salad, drizzle the oil on, add a pinch of salt and pepper, and toss everything together. Taste to see if it needs more salt or more lemon juice. 
Parsley, basil, mint, onion and lemons
Chopped herbs
The proportions in this recipe reflect how I usually cook--the thing becomes the unit of measurement--for instance, I use a whole onion, not a cup of onion. Whenever I buy herbs, I use them ALL. What is the point of using a teaspoon measly of any kind of herb?---you won't taste it, and you'll waste most of what you bought.
 This was lovely. This was only the second time I've made it. I am adding it to my regular rotation of sturdy salads.

Saturday, April 13, 2013

Buttermilk Biscuits

I really don't have a sweet tooth, so I don't do all that much baking. I like making bread, pretzels, bagels, biscuits--savory baking. I made these on a Saturday morning for breakfast. My best tip for biscuits is to eat them hot--they decline in deliciousness as they cool. 
Ingredients: 
2 1/4 cups flour
2 teaspoons to 1 1/2 tablespoons  sugar
1 tablespoon  baking powder
3/4 teaspoon table salt
3/4 teaspoon baking soda
9 tablespoons melted butter
1 cup uttermilk.


What to do: 
Preheat oven to 400 °F and grease a cookie sheet. Mix all the ingredients! You may need to use your hands. The dough will be craggy and stiff. Wad it up into little balls (this recipe makes 6) and place on the greased cookie sheet. Bake for about 20 min, or until golden brown. 
Eat with jam, or make into bacon and egg  sandwiches, or just eat alone. 
Wonderful. 
Buttermilk being added to flour.

Melted butter. This is why they taste good.
The dough
Before
After! With a pug photo bomb.
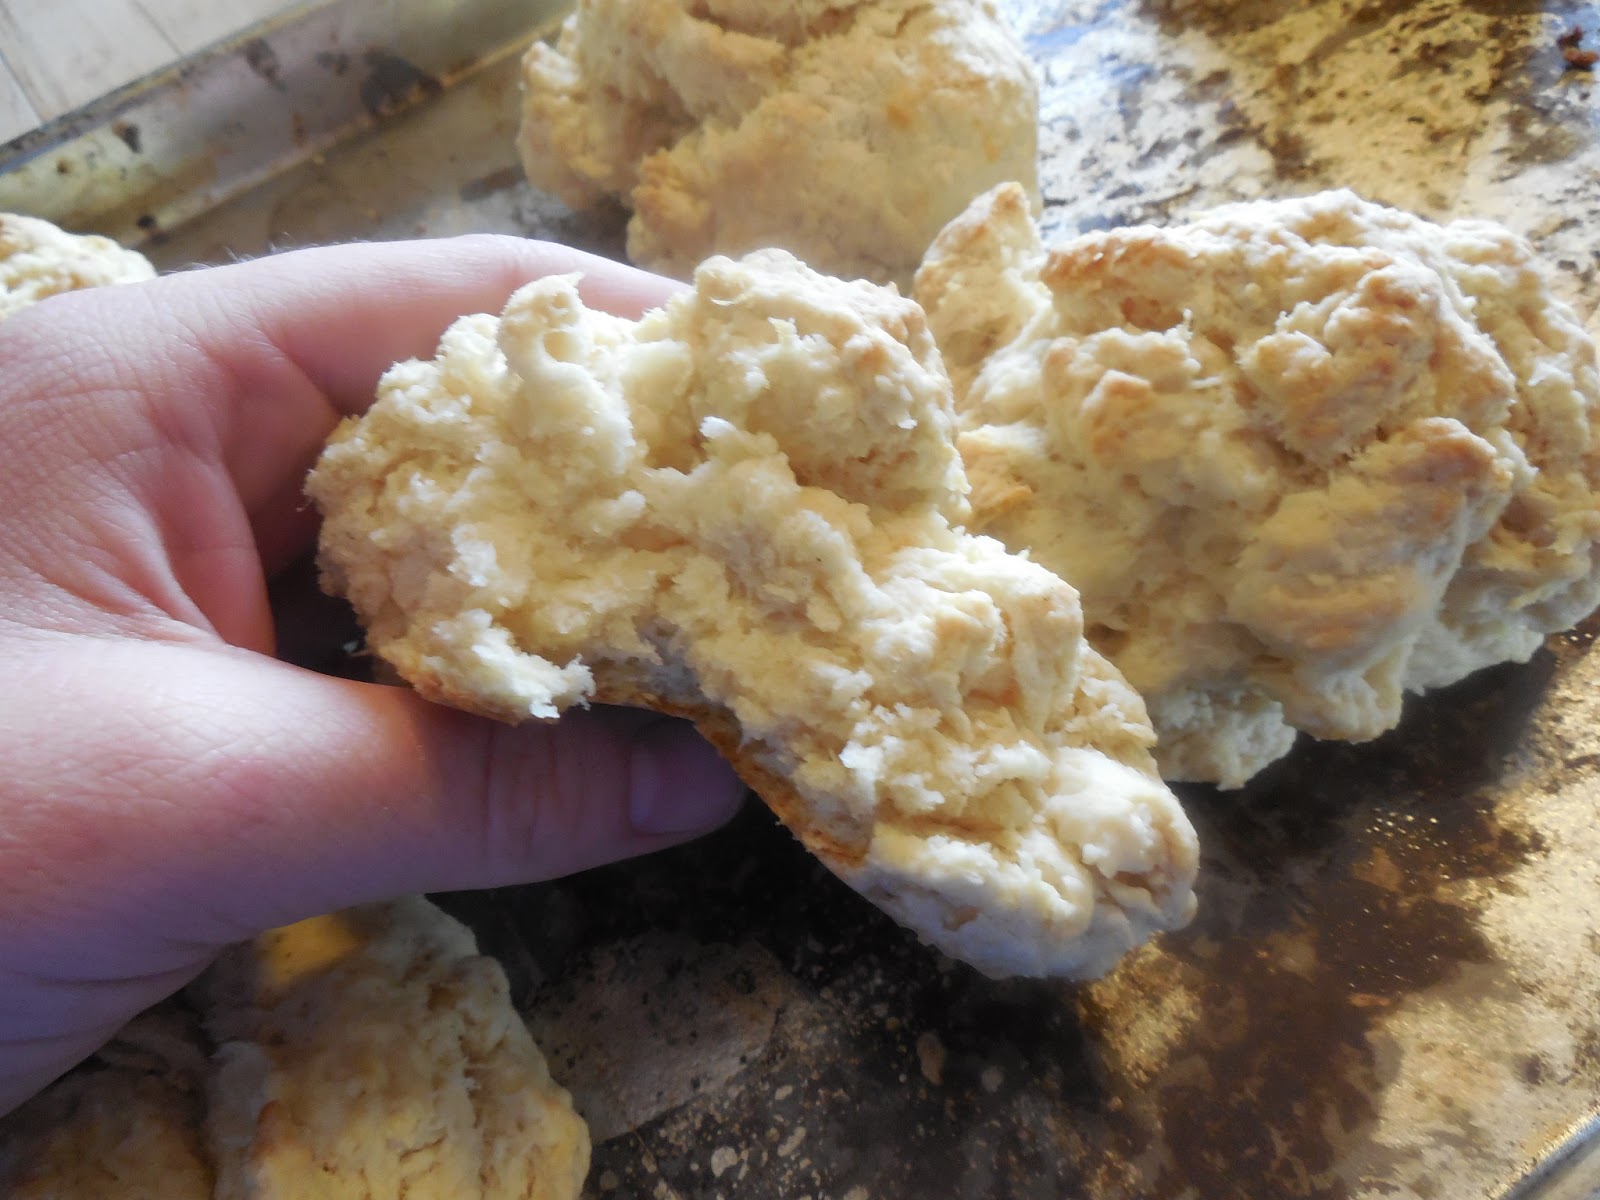
Look at that lovely crumb.
 A great breakfast, and these can be incorporated into meals a million ways. Biscuits and gravy, breakfast sandwiches, chicken and biscuits, etc. 
Enjoy!

Thursday, April 11, 2013

Penne ala Vodka with chicken

I used a LOT of bacon.
Whenever I visited my grandma in Long Island as a kid, we'd go to an Italian restaurant in a strip mall and this is what I'd order. That was an impressive restaurant: all the bread and butter you wanted! You got to shake the cheese on yourself (or until your grandma pinched you to stop). I  liked this because the sauce was pink. Now, I love it because it has bacon, cream and alcohol all together in one bowl of  goodness.
But this recipe is so good--it's cheap, delicious, decadent, and quick to make. This is the perfect meal to eat after a long day at work, while watching TV on the couch and having a well-deserved glass of wine.

Ingredients: 

5 chicken thighs 
 4 strips bacon, sliced into small batons
1 head garlic, minced 
1 yellow onion, chopped
1 large can (28 oz) tomatoes 
1 cup vodka (no need to buy the good shit! Popov in the plastic bottle is FINE)
1 cup heavy cream 
1 tsp red pepper flakes 
Parmesan
Basil, chopped (how ever much you want)
Parsley, chopped (as much as you like)

What to do:
 1. Crisp the bacon in a deep-enough pan (I used a braising pan. Use a sauce pan with sides at least an inch high)

2. When the bacon is crispy, add the onion and garlic. Cook for about five minutes, or until just a bit colored. 
3. Meanwhile, at some point, cook the chicken thighs. Salt them, then cook them in a saucepan in some hot olive oil, about 4 min per side.
As you continue making the sauce, let these cool and they're done. You'll need to chop them, so they should be cool enough to touch.
4. Then, deglaze the pan with the vodka. When I was at this step, it burst into flames. So don't stir it over the edge and create a flame-path back into the pan. If it does catch on fire, put the pan's lid back on. This will not ruin the sauce, don't worry.
5. Add the tomatoes. Let it simmer for about 10 minutes. You want the tomatoes to break down a bit and for everything to meld.
6. Chop the chicken thighs.

7. At some point, boil some penne. Stop when it's not quite done--you'll cook it in the sauce a bit more later. 
8. Add the cream and chicken thighs to the sauce!

8. Mix it up and let it simmer. Add the red pepper flakes. I used a lot, and afterwards wished I'd used even more.

9. Drain the penne and put it in. Then, let it simmer for about 5 minutes. This will plump the pasta and fill the tubes with sauce. So when you bite, sauce squirts into your mouth.
10. After you turn the heat off, stir in the chopped parsley and basil. Save some to sprinkle on top.
11. Serve with an inappropriately large amount of parmesan and the leftover herbs!
Those tubes are full of sauce.


Wednesday, April 10, 2013

Pork "Bulgogi"

This is "bulgogi" because, while this pork turned out delicious and tender--was it bulgogi? I would imagine any Korean would say no. It was good, but it came out different than the fabulous, thin-sliced, spicy BBQ pork you get at Korean restaurants with table grills. By the way, if you love Korean food and live in Denver, go to Q Table in Northglenn. It's good enough to make a drive to Northglenn totally worth it.
So I would change the name of this dish to "vaguely Asian pork cutlets." Even if I originally set out to make bulgogi.

Ingredients:
Boneless, thin sliced pork chops. I used two packages, but any amount that fits in a freezer bag is fine.
1 head garlic
1 3 inch piece of ginger
1 peeled kiwi
3 TB soy sauce
3 TB sesame oil
3 TB brown sugar
2 TB chili garlic paste or sriracha
1 shallot
2 bunches green onions, bottoms cut off and left whol
1 red onion, cut into large slices

What to do:
1. Put the garlic, ginger, shallot, kiwi, soy sauce, sesame oil, brown sugar, and chili paste in a blender or food processor. Blitz it up into a paste.
This smells really, really good.
2. Put the pork and onions in a big freezer bag. Then, put the marinade paste in and mush it around.
3. Let it marinate. I left it overnight, but a few hours would be fine.

4. Cook!This would have been WAY better on a barbeque, but it was snowing, so I couldn't be bothered. I cooked them in a hot cast iron pan. Get a pan very hot, then cook about 4 min per side.

5. Then, cook the marinated onions, also in a hot pan. Or a grill, if you're grilling. Again, a grill would have been even better.
6. Put the leftover marinade into a small saucepan, add half a cup of hot water, and boil with the lid on to make a sauce. I tasted mine, then added a few teaspoons each of rice vinegar, chili paste, soy sauce, and brown sugar to make it into a stronger-tasting, more delicious sauce.Boil for about 10 min or until saucy.
7. Serve the pork over rice. Dribble with sauce. Serve with cooked marinated onions.YUM!
I also made some quick stir-fried shitake mushrooms and sugar-snap peas.


Yummy! Invite someone you like over, and make a great weeknight of it.
The dogs will be super jealous:

Tuesday, April 9, 2013

Sour Cream Sandwich Rolls

From stinky beginnings....
By "sour cream", I don't mean such as you would buy to put on tacos. I mean, there was a bottle of whipping cream in my fridge, and it went bad.
The bottle was maybe a third or quarter full of stinky cream. I found this out by ruining a cup of coffee.
It was a snow day, so I felt like baking something. Somewhere in the back of my head was an article I read about how people used to use rotten milk as the rising agent in bread. It makes sense--all kinds of bacteria create gas, plus, you like that sourdough funkiness in bread. So I decided to experiment: use the gross cream to make bread.
I started like you would with any bread: I dissolved a package of yeast in some (about 1.5 cups) warm water with 2-3 tablespoons of sugar. I also added the bad cream (probably about a third cup) to the mix, then waited 20 minutes for the yeast to froth up:
I seemed to me this yeast got foamier than yeast usually does. Perhaps whatever microbes lived in the cream joined forces with the yeast for even more riotous fermenting?
Then, I added flour and mixed / kneaded until I had a pliant, not-too-sticky, cohesive ball:
Then let it rise for half an hour:
Ok, so I let this bread rise in a weird way: I stuck it in the dishwasher. It had just finished a load of dishes, so it was all warm and moist in there: perfect yeast weather. I wedged the bowl in among the clean plates and closed the door. The sterility of my kitchen is clearly not a top priority.
Then, I rolled the dough into little balls and brushed them with melted butter and sprinkled them with salt:
Then let them rise for another half hour:
Then baked them in a 400 degree oven for 35 minutes. With 5 minutes remaining, I took them out, brushed the tops with an egg white, then put them back in.
These came out great! They just taste like good bread. Did the sour cream make any difference? Or do they taste exactly as they would have without it? I can't tell.
But they were good. My high-altitude bread making has been inconsistent. Sometimes my bread comes out dense and heavy--but these were light and spongy in the middle with a nice crisp crust.
Can't wait to make sandwiches with it. 


Sunday, April 7, 2013

Thai Slaw

I made this slaw to go with Adobo Chicken, but I think it would go great with any vaguely Asian meat main dish. It's crunchy and bright and acidic, so it was a perfect counterpoint to the soft, rich, fatty adobo stew.
This is a STRONG flavor: the fish sauce makes it funky and salty. Personally, I LOVE fish sauce and dishes where it stands out, like in my all-time favorite food, the pad-thai pig ears from Euclid Hall. In fact, this dressing reminded me of them, and got my brain working in all manner of fish-saucy evil directions: thai chicken wings? Thai-glazed oxtail? Thai pork cracklings over noodles? Look forward to incarnations of this dressing in future, fat-tastic situations.
But I would recommend people with more timid palates steer clear.
I, however, will be making it over and over.
The ingredients. I forgot peanuts at the grocery store, so I went and bought some snack ones from the bodega on our corner. Also: I neglected to include the jalapeno.
Recipe (adapted from the nytimes)
Put shredded Savoy cabbage (about 12 cups) in a large bowl with 1/2 cup chopped peanuts, i chopped jalapeno and 1 cup chopped mint. Combine 3 tablespoons fish sauce, 1 to 2 tablespoons rice vinegar, 1 tablespoon neutral oil, 1 tablespoon brown sugar, the juice of 2 limes; whisk to dissolve the sugar. Or shake like crazy, if you made your dressing in old olive jars like I do. Add the dressing to the cabbage and toss. 


Again: lettuce-free salads are the BEST. 

Adobo Chicken

Totally, utterly delicious.
If you've never made Adobo, you MUST. It has nothing to do with the brand of spice mixes of the same name:
 
This stuff if actually not bad, taste-enhancement wise. It's mostly MSG. So it makes things taste pretty great. But again: this has NOTHING to do with adobo, the wonderful technique / recipe.
"Adobo" is the everyday dish of the Philippines, and people make it a million different ways: chicken or pork or fish, coconut milk or just oil, vegetables included or just meat. But it's always a stewed meat dish, and always includes garlic, vinegar, soy sauce, bay leaves, and brown sugar. It's fabulous: sweet, tangy, spicy, fatty. Serve it over rice and let the sauce soak in. Yummmm.
I modified this recipe from one I found attached to a restaurant review of a Filipino place in the nytimes website.
The ingredients
 RECIPE 

Ingredients: 
 2 cans coconut milk (don't use the light kind)
¼ cup soy sauce
1 cup rice vinegar
12 garlic cloves, peeled and chopped
1 TB chili garlic paste or sriracha
3 bay leaves 
1/2 cup brown sugar
1½ teaspoons freshly ground black pepper
2 packages of bone-in, skin-on chicken thighs (I used a total of 8 thighs--we are planning on eating this for lunch all week. 
6 carrots, chopped
1 red onion, cut into large slices
2 red bell peppers, chopped

What to do
1. Combine all of the marinade ingredients in a large, nonreactive bowl or resealable plastic freezer bag. Add the chicken and turn to coat. Refrigerate overnight or for a few hours (*note: I have made this before in a hurry and skipped marinating--it was still great) 
2. Place chicken and marinade in a large lidded pot or Dutch oven over high heat and bring to a boil. Immediately reduce heat to a simmer and cook, stirring occasionally, until the chicken is cooked through and tender, around 30 minutes. 
3. After 10 minutes of simmering, add the chopped carrots and onion. continue simmering.
4. At the very end, add the red bell pepper. This only needs to simmer for about 5 minutes You don't want this to cook too long or it will lose it's flavor and become mushy. 
5. Place chicken pieces on a roasting pan and place under broiler for 5 to 7 minutes, until they begin to caramelize. You want both sides of the chicken thighs to have color and crispness. 
6. Put the chicken back in the pot of sauce, along with the pan juices released by broiling. 
7. Serve chicken over rice with a big scoop of vegetables and sauce. 
8. Moan happily.

So much garlic!
Chicken in the bag of marinade. I let it sit overnight--I think the vinegar softens the meat up, leaving you with even-more-tender finished chicken.
Chicken before broiling
After broiling.
The finished adobo.
This dish has so many things to love: it's pretty cheap to make, it tastes AMAZING, it's all in one pot, etc. 
I made this on Saturday afternoon to be our "eat all week" thing in the fridge for the week's lunches or dinners. I made a Thai slaw to go with (will include that recipe soon).
Chicken adobo, Russian Imperial Stout, Thai slaw. The perfect lunch to eat on the deck, before going back to bed because it's Saturday.
Enjoy!